
Film Noir Prompts: Blinds, Rain-Streaked Windows, and a Lamp Set the Scene
When you want a film noir image, the easiest prompt to reach for is “film noir, black and white, high contrast, cinematic.” Give most models those four phrases and you’ll get an ordinary photo converted to black and white: gray all over, with shadows that aren’t dark enough and highlights that lack focus. It looks old, but it doesn’t look like film noir.
The noir look is shaped primarily by light. Most of the frame sinks into black, with just a few bright areas carved out by hard light. The viewer’s eye follows wherever that light leads. So start your prompt with the light: where it comes from, what it passes through, and where it falls. Characters, clothing, and props come afterward.
Start With Where the Light Enters
The key line in Light Through the Blinds in a Rainy Alley describes “a blinding light passing through the blinds of a nearby building, casting zebra-striped shadows across his face and the rough brick wall behind him.” That sentence gives the model three things: a source of light from a nearby building, an opening—the blinds—and the surfaces it hits: his face and the brick wall. Leave out the opening, and the model may produce an ordinary beam of side light. Leave out the surfaces, and the stripes may appear only in the background, leaving the character untouched.
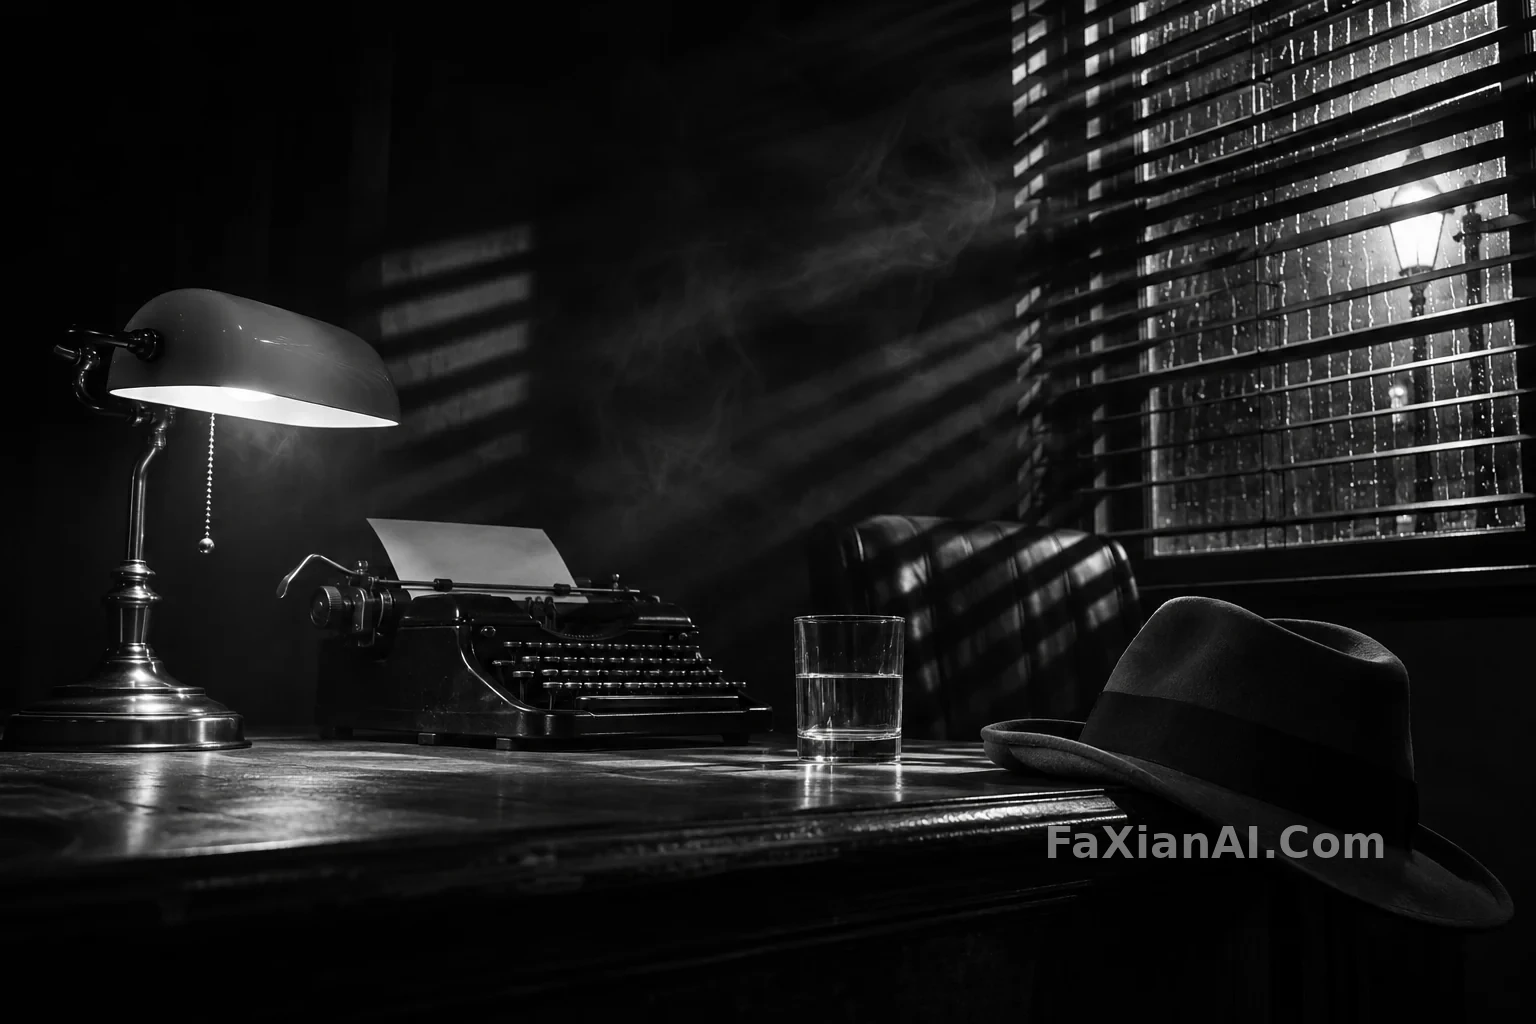
Blinds work so well because they break a beam of light into rhythmic stripes. Those stripes become part of the composition; even without a person in the frame, the interplay of light and shadow can carry the image. That’s the approach used in the lead image above: one streetlamp, one set of blinds, and three specified surfaces for the stripes—the desk, the wall, and the back of the empty chair. Name those three surfaces, and even an empty room gains depth.
When the Lines From the Blinds Matter More Than the Face gets more specific: the stripes continue across the cheek, neck, and chest. It isn’t film noir—it uses the warm light of golden hour—but the principle is the same. If the stripes break abruptly across the body, they look pasted on. Let them travel continuously from the face to the collarbone, and they look like real light coming through a window.
Specify the Shadows—“High Contrast” Isn’t Enough
“High contrast” is vague. The model might simply darken the midtones. A more reliable approach is to say which areas should be black.
The Lonely Detective in the Shadows of the Blinds describes “a desk lamp casting harsh shadows across his face, illuminating half his features while the other half remains in darkness.” Leaving half the face dark is an instruction a model can follow. The equivalent line in the lead image is “the rest of the room sinks into deep black.” In other words, tell the model to leave everything unlit except the pool around the lamp and the stripes from the blinds.
The Last Tram in a Film Noir Night is more economical: the wet cobblestones “reflect only narrow slivers of light.” A rainy night street can easily turn into a neon surface reflecting light everywhere—and suddenly you have cyberpunk. Keeping the reflections narrow preserves the darkness and makes that small glow in the tram window stand out.
Once the shadows are clearly defined, phrases like “deep blacks” and “fine grain” have a purpose: they add texture to a light-and-dark structure that’s already there.
Use Rain, Smoke, and Fog to Make Light Visible
Light itself is invisible in the air. Film noir often uses rain, smoke, and fog to give beams of light a visible shape.
London Fog at the Pier, a Cigarette Beneath the Streetlamp uses a single, lonely lamp. “Thick volumetric fog” gives its halo room to spread, while a wisp of cigarette smoke rises through it. The light in the smoke and fog is the focal point; the person recedes into a partial silhouette. The lead image adds just one line: “a little thin haze in the air makes the beams visible.” Keep the amount small. Too much haze turns the image gray and wipes out the blacks you worked so hard to preserve.
Put the rain on the glass. “Rain streaks running down the window, catching the light as bright lines” is far more specific than “a rainy night”: the model knows where the rain should appear and that it should be illuminated.
Let Props Tell the Story
In film noir, the objects on a desk often say more than a person’s expression. The lonely detective image gives us a half-full glass of whiskey, a cigarette still burning, and a folder with a photograph peeking out. Those three objects suggest a late night, someone waiting, and a case underway. There’s no one in the lead image; instead, a fedora, a typewriter, half a glass of water, and an empty chair suggest someone has just left or hasn’t returned yet.
You don’t need many props. Three or four are enough, and each one should catch the light. A prop buried in darkness might as well not be there.
For a sequence of connected images, take a look at Twelve Panels of Film Noir Without a Single Word. It prohibits text altogether, forcing the model to move the story forward through composition, light, and shadow. For more detail on keeping characters and settings consistent across panels, see How to Prompt Four-Panel Grids, Nine-Panel Grids, and Storyboard Strips.
A Template You Can Adapt
> Film noir [still life / portrait / street scene], cool black-and-white monochrome. [One sentence describing the scene]. The only light source is [a streetlamp / a desk lamp / light through a gap in a door]. Light passes through [Venetian blinds / a gap in a door / a stair railing], casting sharp striped light and shadows across [surface 1], [surface 2], and [surface 3]. [Rain streaks / thin smoke / fog] make the light beams visible. The rest of the frame sinks into deep black. [Three or four props, each positioned in a lit area]. [Focal length], [camera angle], high contrast, fine grain. No text or logos.
Start by filling in the light source, the opening, and the three surfaces where the light falls. Then add the props. You can include a person or leave the scene empty; if there’s a person, specify which half of the face is in shadow. To learn how to bring the light source itself into the frame, see Put the Light Source in the Picture. For portraits that avoid a plastic skin look, see Portrait Lighting Prompts.