
老照片修復上色提示詞:restore old photo prompt 劃痕泛黃一次說清楚
老早廂照相館修一張底片,師傅要蹲在紅燈底下忙半宿,拿棉籤蘸藥水一點點擦劃痕,急不得。現在這活兒換成打字,效率是高了,但道理沒變——想讓一張舊照片翻新,還是得一步一步交代清楚,不能指望一句"修復一下"就把幾十年的褶皺、黴斑、泛黃全解決掉。
restore old photo prompt,先把"保留"兩個字寫在前頭
修復類的提示詞最容易犯的錯,是光顧著說要去掉什麼,忘了交代要留住什麼。人臉的五官比例、原本的表情、皮膚上真實的紋理,這些如果沒在提示詞裡點明要保留,模型修著修著容易把臉修"平"了,看著乾淨了,但不像這個人了。
- "Restore this old photograph: repair scratches, creases and dust spots, keep every facial feature and expression identical to the original, do not smooth away real skin texture."(修復這張老照片:修補劃痕、摺痕和灰塵斑點,保持面部特徵與表情和原圖一致,不要磨平真實的皮膚質感)
- "Remove scratches, mold spots and stains from this old photo while preserving the original lighting direction and shadow falloff on the face."(去除劃痕、黴斑和汙漬,同時保留人臉原本的光照方向和陰影過渡)
- "Repair the fold line running through this photo and blend both halves so the seam is invisible, keep clothing texture continuous across the repaired area."(修復照片上的對摺痕跡,讓接縫處不留痕跡,衣物紋理在修復區域保持連貫)
- "Fix the yellowing and uneven exposure on this old photo, balance highlights and shadows, keep the original film grain visible at a low intensity."(修正泛黃和曝光不均,平衡高光和陰影,保留低強度的原始膠片顆粒)
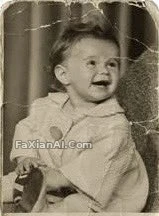
這張是站內一個修復上色的完整案例,劃痕去掉了,但臉上該有的紋路和光影沒丟,這就是"restore old photo prompt"該有的分寸。
old photo restoration ai最容易翻車的,是背景
背景比人臉更容易被模型"自由發揮"。老照片背景常常是桌布、牆面這類重複紋理,破損處一旦要補全,模型如果沒被提醒該照著周圍的圖案延伸,很可能補出一塊風格不搭的色塊。
- "Reconstruct the faded background of this old photo, keep the wallpaper pattern consistent with the surrounding area, do not add modern elements like power lines or plastic signage."(重建這張老照片褪色的背景,讓桌布圖案和周圍保持一致,不要新增電線、塑膠招牌這類現代元素)
- "Repair the torn corner of this family photo by extending the visible mural pattern behind the subject, keep the reconstructed area seamless with the rest of the image."(用人物身後可見的壁畫圖案延伸修補撕裂的照片邊角,讓修補區域和其餘部分無縫銜接)
- "Upscale this old photo to a higher resolution, sharpen facial and hair details without introducing plastic-smooth skin, keep the background texture at the same level of detail as the subject."(把這張老照片放大到更高畫質晰度,銳化面部和髮絲細節但不要讓皮膚變成塑膠感,背景紋理清晰度和主體保持一致)
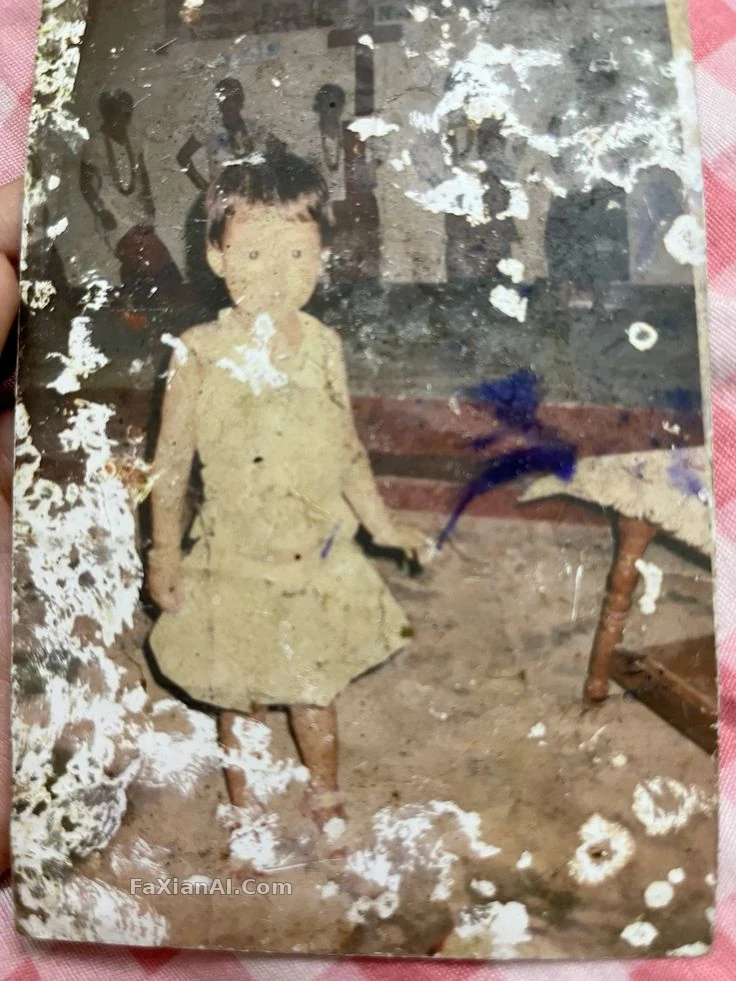
這一張的壁畫背景處理就沒瞎補,劃痕沒了,壁畫的筆觸還在,這條分寸比去劃痕本身更難拿捏。
colorize black and white photo prompt,顏色寧可淡,不能豔
黑白照片上色最怕的不是上不上顏色,是上得太"數碼"。飽和度一高,年代感立馬散了,跟照片本身的質地對不上。
- "Colorize this black and white photo naturally: skin tones warm but muted, hair color matched to typical dark tones of the era, clothing colors desaturated rather than vivid, background softly toned down to keep focus on the subject."(自然為這張黑白照片上色:膚色溫暖但不濃烈,髮色貼合年代常見的深色調,服裝顏色偏低飽和而非鮮豔,背景色調柔和降低以保持視線聚焦在人物身上)
- "Colorize this photo with era-accurate color science: 1970s warm film tones, slightly faded reds, avoid modern digital saturation."(按年代校色為這張照片上色:1970年代暖色膠片調,紅色略帶褪色感,避免現代數碼式的高飽和)
- "Restore this photo taken by a disposable camera in the 1990s, fix the flash overexposure on the face but keep the film grain and soften the red-eye by about 70 percent rather than removing it completely."(修復這張1990年代拍立得照片,修正臉部閃光燈過曝但保留膠片顆粒,把紅眼柔化七成左右而非完全去除)
- "Recreate this old photo at DSLR-quality clarity: refine skin texture subtly, sharpen eyes and hair strands, keep facial identity 100 percent consistent with the original."(把這張老照片翻新到單反級清晰度:輕微精修皮膚質感,銳化眼睛和髮絲,人物身份和原圖保持100%一致)
- "Fix the faded colors on this old wedding portrait, restore fabric texture on the dress, keep the couple's facial identity unchanged."(修復這張褪色的婚紗老照片,還原禮服的面料質感,保持新人面部身份不變)
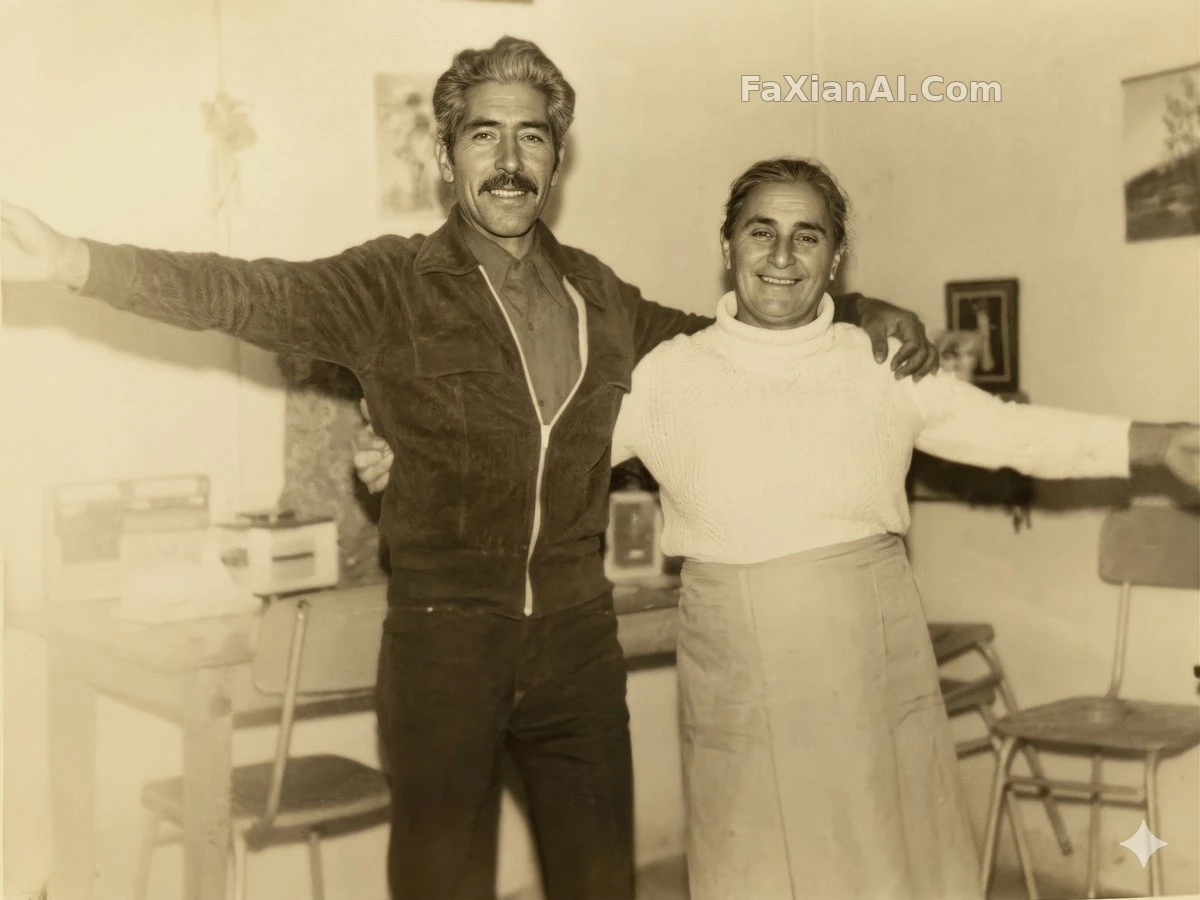
這張4K修復就是"少改一筆"的示範——解析度上去了,年代該有的味道沒被抹掉。
判斷修復好不好,就三條標準
判斷一張old photo restoration ai的結果好不好,不用想太複雜,就看三件事:臉對不對得上原來那個人,劃痕黴斑去沒去幹淨,顏色(如果上色了)豔不豔過頭。這三條佔一條不達標,這張圖就還得回爐。
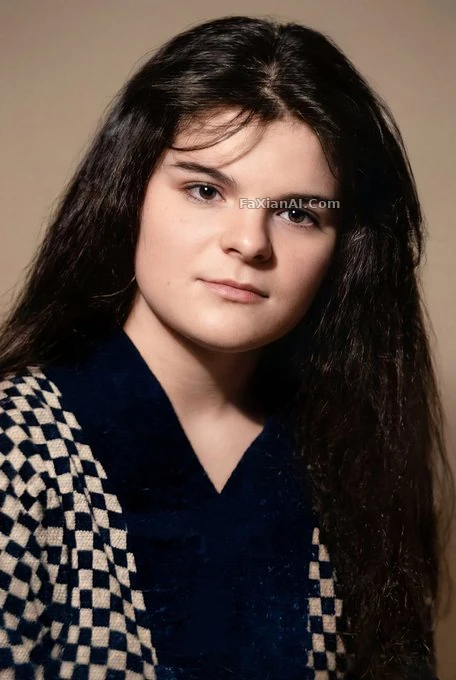
這一張的修復標準基本就是照著這三條來的,劃痕沒了,臉還是那張臉。
修舊照這件事,跟修老底片是一個理,講究的不是速度,是分寸。提示詞寫具體一點,該保留的寫清楚,比堆砌"清晰、高畫質、完美"這類空詞管用得多。翻拍去痕這一步也一樣,很多人拿手機翻拍一張老照片直接扔進去修,其實翻拍前先拍平整、拍夠光,比修復提示詞寫得再細都管用——原始素材的底子差,colorize black and white photo prompt寫得再準,顏色也上不出那份年代該有的潤澤。
想再看看別的老物件質感怎麼處理,可以翻翻人物一致性怎麼保住這篇,寫法思路是通的;如果是提示詞該怎麼組織句子結構,提示詞公式那篇也講得比較細。這批修復上色的案例圖都歸在修圖改圖這個分類裡,翻拍老照片的活兒,慢慢來,急不得。首頁image.faxianai.com還有更多能直接抄的提示詞案例。