
Phone Candid-Snapshot Prompts: Which "Imperfections" Make an AI Portrait Look Like a Real Snap

The place an AI portrait gives itself away is rarely the hands or the facial features — it's usually that it looks too good: light that's too even, a composition that's too stable, skin that's too clean. One glance and you can tell it's a studio shot or a render. What a lot of people actually want is the opposite: a photo that looks like a friend snapped it off-hand and posted it to their story.
There's a counterintuitive thing about these candid phone photo prompts: the more adjectives, the faker the result. Write "natural, candid, realistic" ten times and the model still hands you a polished hero shot. What actually works is a handful of concrete things: who's holding the phone, where they're shooting from, which path the light takes in, and which flaws are allowed to show. Here's how the site's cases break it down, one by one.
1. Establish "Who's Shooting" First: Camera Position Is Half the Realism
A candid shot's point of view always has an origin story. A selfie is arm's length away. A candid is shot through something. A mirror shot is a reflection looking back. Spelling this out in the prompt does more work than piling on the word "realistic."
The sunny car selfie case gets specific: right hand holding the phone, roughly arm's length away, front-camera logic, an equivalent 24-28mm, with a touch of the edge distortion selfies typically have. That last point matters most — the slight warp from a wide front lens is exactly the cue the eye uses to read "selfie."
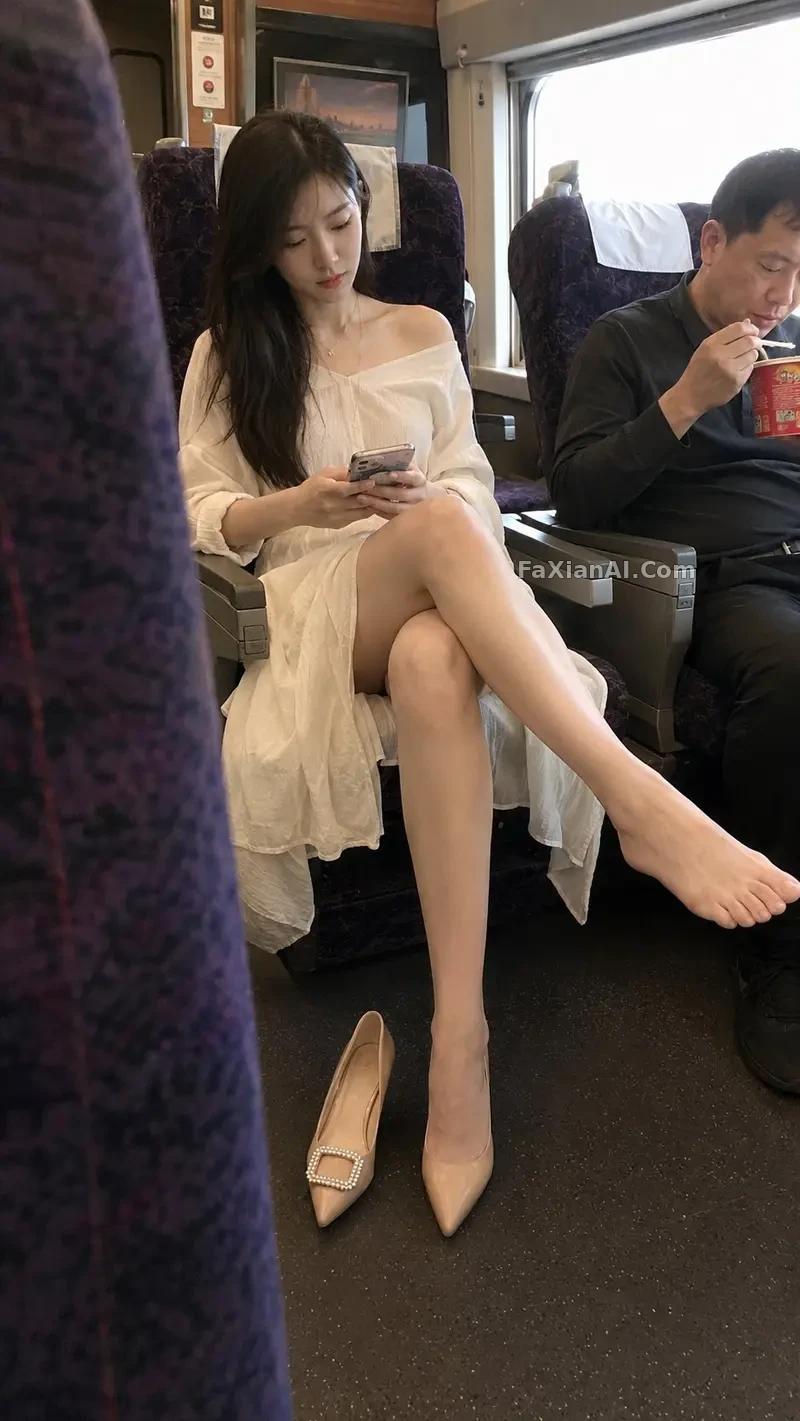
The train window-seat candid takes a different route: the camera sits one row ahead of her and slightly to the left, at a 28-35mm focal length, just below chest height, with a purple seatback crammed into the left edge of the frame, almost touching the lens and badly out of focus. That blurred foreground object is the evidence of a candid shot — viewers subconsciously fill in the person holding the phone behind it.
The library over-the-shoulder angle case splits the viewpoint into four JSON fields — pov, angle, distance, framing: over-the-shoulder, a slightly elevated angle, medium shot, 9:16 vertical story framing. The vertical format itself is a signal too; things shot off-hand are rarely landscape.
2. Light Needs a Path, Not Just "Soft"
Studio light is arranged. Candid light is stumbled into. The difference in how you write it: don't just describe the light's quality — write what it passes through before it reaches the face.
The car selfie case writes "bright daylight passing through the windshield and side window," with the time limited to mid-morning through early afternoon. The glass softens the light first, which is why the cheekbones and nose bridge get that gentle, non-harsh highlight. Swap that for "soft natural light" and the model will likely just hand you a giant softbox look instead.
The bathroom mirror, brushing teeth case layers two light sources: cool white LED overhead (4000-5000K) plus a warm vanity light at the mirror's edge. Home lighting really is mixed like this, and the warm-cool clash is exactly what reads as real. If you want to write the light source itself into the frame, Write the Light Source Into the Scene covers the same logic in more depth.
The suburban roadside snapshot case keeps it plainer still: low-angle evening sun, soft shadow edges, uncorrected white balance, standard contrast. That word "uncorrected" is doing real work — nobody color-balances a quick phone shot.
3. Write an Imperfection Checklist, and Be Specific
This is where candid-feel prompts differ most from ordinary portrait prompts. You can't just write "imperfect" — you have to spell out which kind of imperfection.
The dawn bathroom mirror selfie case lists four things in a single English sentence: phone blocking part of the face, fingerprints on the mirror, slight motion blur, and a composition that clearly wasn't planned. Every one of them is something visible — the model just has to paint what's named.
The bathroom brushing-teeth case puts its flaws into the skin and the environment: pores, slight redness, a bit of oil on the forehead, a dripping faucet, water marks left on the counter. Its negative prompt specifically excludes beauty filters, plastic-looking skin, and over-symmetry.
The Polaroid kitchen coffee pour case swaps in a different medium: SX-70 square film, soft focus only at the edges, an overall warm-yellow cast, visible grain. The "imperfection" here comes from the medium itself, so the subject in the center still reads clearly — a different thing entirely from a shot that's just blurry.
One ordering is worth remembering: write the device-caused flaws first (distortion, grain, fingerprints, motion blur), then the environment-left flaws (water marks, clutter, stray hair), and only then the flaws on the person (pores, oil, loose strands). Layer all three and the image holds together.
4. Don't Treat Sharpness as All-or-Nothing
Candid doesn't mean blurry everywhere. The cases on the site that work well all specify exactly where it's sharp and where it's soft.
The car selfie case asks for "the face and the hand holding the phone kept in ultra-sharp focus," with the street outside the window softly out of focus. The suburban roadside case goes the other way, calling for "deep DOF, everything in focus," because a phone's main camera shooting outdoors naturally has deep depth of field to begin with. The phone-straight-out-of-camera half-body case is even more direct: sharp from foreground to background, no bokeh, no film grain, plus a line about how "modern smartphone HDR lifts the shadows."
So don't default to stuffing "shallow depth of field, blurred background" into a candid prompt. A phone's depth of field isn't a DSLR's, and getting it backwards pushes the photo toward looking like "a photographer's work" instead.
5. A Drop-In Snapshot Template
A casual smartphone [selfie / mirror photo / over-the-shoulder snapshot] of [subject], taken at [arm's length / from one seat away / through the bathroom mirror] with a [24mm front camera / 28mm main camera], [9:16 vertical] framing that looks unplanned. Light comes from [daylight through the car windshield / overhead cool LED mixed with a warm vanity lamp], falling on [cheekbones and nose bridge]. Visible imperfections: [slight wide-angle distortion at the edges], [a blurred object close to the lens in the foreground], [fingerprints on the mirror], [mild motion blur]. Skin shows pores and a little shine, no retouching. Keep [the face and the hand holding the phone] sharp; [the window view / the background tiles] softly out of focus. Natural, uncorrected color.
6. Common Ways to Get It Wrong
1. You list the flaws, then tack "masterpiece, studio lighting, flawless skin" onto the end anyway — undoing everything written before it.
2. You only write "shot on a phone" without specifying camera position. The model defaults to the most standard front-on medium shot, which has nothing to do with candid.
3. You ask for both shallow depth of field and a "phone feel" at once — the two signals cancel each other out.
4. When a real reference photo is involved, you need to specify, the way the car selfie case does, that "the face above matches the uploaded photo, no beautification," or the model will casually smooth it into an influencer face. For more on keeping a character consistent, see How to Keep Character Consistency in AI Image Generation.