
Photo Frame and Polaroid Prompts: 12 ChatGPT Photo Frame Prompts That Keep the Texture of Old Times
There was a tin biscuit box at home when I was a kid, used just for holding printed photos — edges yellowed, sometimes with a faint imprint left behind from another photo pressed against it. It took a while to realize that what makes a polaroid or an old frame beautiful is exactly that "imperfection" — the light leak, the yellowed white border, the grain. Describe these things in clean, precise digital language and you actually lose that feel. The chatgpt photo frame prompts in this post are all focused on putting that imperfection into words clearly.
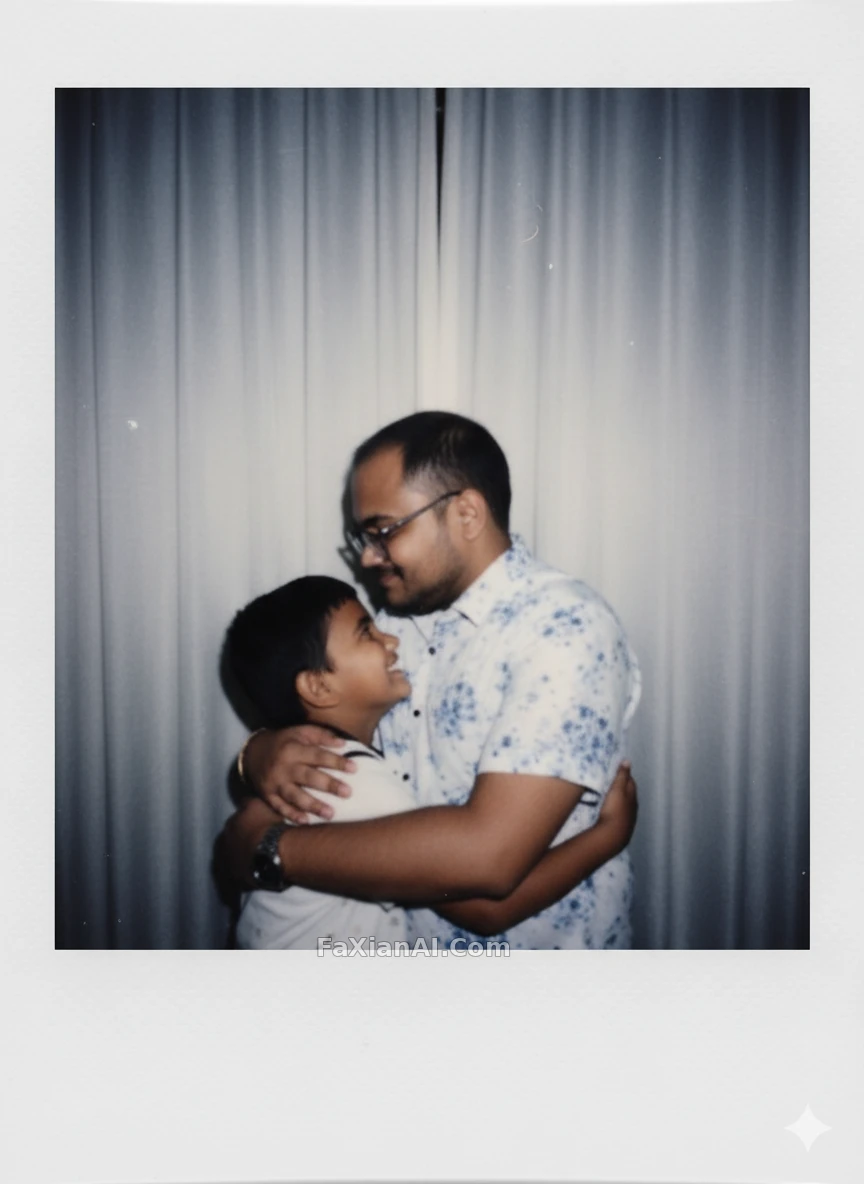
Polaroid texture: white border and light leak
The most iconic thing about a polaroid is that wide white border, plus the extra-wide strip at the bottom — don't miss either detail when writing a polaroid frame prompt.
1. "Apply a polaroid photo frame: wide white border with extra space at the bottom, slight blur at the corners, warm color cast overall."
2. "Add a soft light leak effect in one corner, simulate the imperfect exposure of instant film, keep the subject clearly visible." — Light leak is something digital cameras fight tooth and nail to eliminate, yet in polaroid style it's the whole soul of the look.
3. "Simulate a slightly underexposed polaroid look, muted colors, visible grain, subject embraced by soft blur at the frame edges."
Old-style frames: wood grain and distressed edges
Compared to a polaroid's instant feel, an old frame is about the texture time leaves behind — wood grain, worn corners. These need to be described specifically; just saying "vintage" isn't enough.
4. "Add a wooden picture frame with visible grain texture, slightly worn corners, warm brown tone matching an antique aesthetic."
5. "Apply an ornate vintage gold frame with subtle tarnish spots, keep the photo inside looking like it was taken decades ago."
6. "Frame the photo with a distressed cardboard border, slightly torn corners, sepia tone applied to the photo itself." This one often pairs with the instructions in the old photo restoration post — restore the photo itself to the right period feel first, then add the frame. Do it in the reverse order and the frame and photo end up looking mismatched.
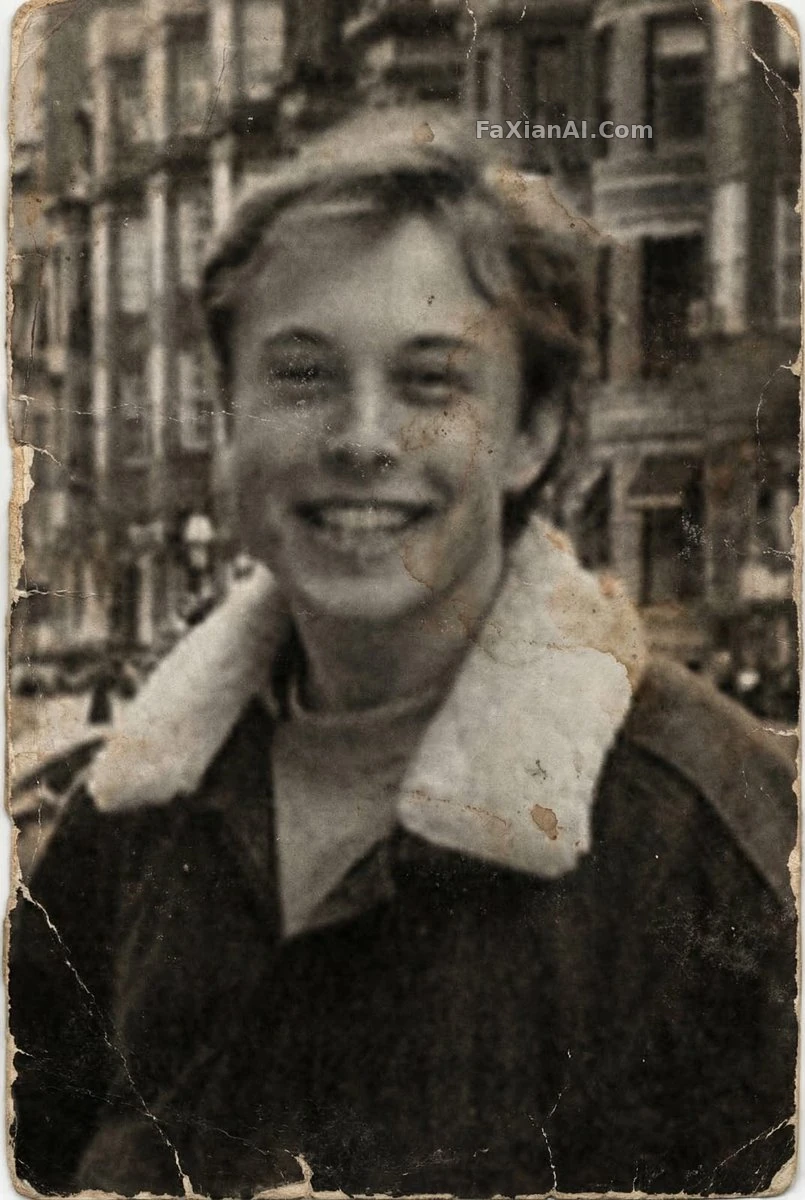
Reference this kind of restoration example: build the photo's texture first, then the frame carries real weight. See the full prompt
Photobooth strips and scrapbook style
Rather than a single frame, a photobooth strip or scrapbook squeezes several moments onto one canvas — like a childhood sticker book crammed full page after page.
7. "Generate a 16-panel photobooth-style grid, same subject, slightly different expression in each panel, black-and-white filter."
8. "Create a scrapbook-style collage with multiple photos overlapping, visible tape marks and torn paper edges, handwritten-style date stamp." Reference examples like the Y2K scrapbook six-panel multi-pose collage — the key to a collage isn't more photos, it's that "just tossed together" looseness. Too neat, and it reads as fake.

9. "Add a film strip border along the top and bottom of the image, sprocket holes visible, keep the photo itself in full color."
10. "Create a four-photo collage in a single frame, each photo separated by a thin white border, consistent lighting across all four."
11. "Apply a washi-tape sticker effect at each corner of the photo, pastel colors, slightly askew placement to look hand-applied." That phrase "slightly askew" matters — too neatly placed and the collage loses the casual quality it's supposed to have.
12. "Add a small digital date stamp in the corner in orange LED-style font, like an old point-and-shoot camera from the late 1990s, keep it subtle and slightly faded." This is a detail a lot of people miss — on a genuinely old photo, the date stamp is never sharp or eye-catching. It's faded by time, not deliberately emphasized.
A closing thought
A frame, at its core, is giving a photo a reason to have been "kept." The white border, the wood grain, the tape marks — they're all telling the viewer: this image wasn't just casually taken, it was put somewhere, looked at by someone. When writing the instruction, it helps more to think "whose desk is this photo sitting on, whose tin box is it in" than to pile on words like "vintage" or "nostalgic."
I later tried re-photographing a few old prints from that tin box at home and sending them to family with a few different frame styles applied. The reactions were surprisingly consistent: what everyone remembered most clearly wasn't how sharp the image quality was — it was the wear and yellowing on the border. Get the details right, and the memory lines back up with them. That's probably why "perfect recreation" is a phrase that almost never applies to frame-style prompts — the imperfection is the whole point.
If the photo itself still needs sharpening or a background swap first, check out the photo sharpening prompts and background change prompts posts alongside this one — it's best to handle the photo itself first and add the frame last. For more related examples, browse the photo editing category. These instructions produce consistent results on Nano Banana too, and the homepage has a generation entry point to try them directly.